Friday, August 19, 2016

Tiny Stars Thank You Card Set


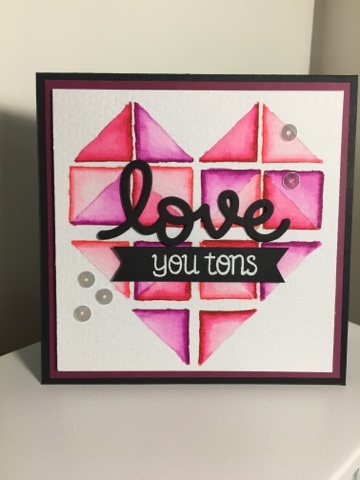
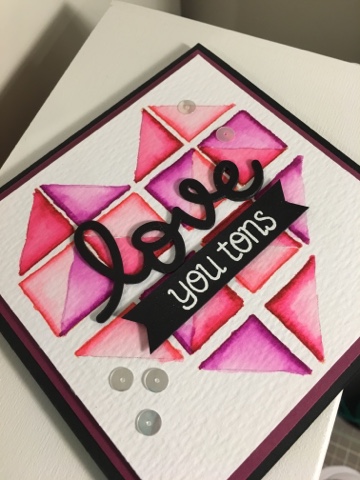
Today I'm here with a card set for you guys!  In the days following our arrival from the hospital with our newest addition, we received quite a few gifts of congratulations.  Knowing that I would be home for quite a few weeks before seeing any of our family and friends who sent the generous gifts, I decided to make some cards to send out.  I could handle that, right?!  Just create some cards while the kids are both napping...easy!!  Ha.  Little did I know that schedules would not always work as I would like but more than that, my crafting mojo had  decided to hibernate on me.  This was not ok with me so I started to just try things out.  When I tell you that I had 3 different cards started with no idea where to go with any of them, I'm not joking.  I was generally a pretty messy crafter before, while supplies stacked on top of each other and it didn't bother me and some how I knew where everything was.  But after baby #2, something changed in me and I couldn't handle the distraction.  Onto clearing off and cleaning my desk top.  Once I did that, I started a new card but with something I was comfortable with... distress ink blending background.


So after that long story, I came up with this card set.  The ink blended background for a set of cards does take a little time but I didn't mind.  I was just happy to be creating again! So onto the video as to how I created these cards.  I apologize if I'm a little scattered in my voice over, it's been a very long time since I've done one.


Supplies:
-Tim Holtz Distress Watercolor Paper 
-Cracked Pistachio Distress Ink
-Mermaid Lagoon Distress Ink 
-Blueprint Sketch Distress Ink 
-Ek Success Powder Tool 
-Versamark Ink 
-Versafine Onyx Black Ink 
-Avery Elle "Sentimental" Stamp Set 
-Hero Arts "Tiny Stars" Background Set
-Black Glitter Paper
-Tim Holtz Super Fine Detail White Embossing Powder 
-WOW Silver Pearl Embossing Powder 

Thursday, August 18, 2016

MFT Camp Create Week!

Hey Everyone!

For the last week, I've been busy picking my brain to create projects to participate in the MFT Camp Create Summer Camp!  I seriously love challenges because it makes you think outside of what might be your comfort zone and play along.  This was a really go reason for me to sit at my craft desk and it really helped in getting my crafty mojo flowing.


I created 5 cards, one for each of the challenges that were presented and I even have videos for each of them.  Unfortunately, there aren't enough hours in the day and I wasn't able to have all the videos edited for you in time to post with my cards.  However, have no fear!  The videos will not go to waste and will appear on my blog and YouTube channel very soon!

Anyways...onto all of my creations for the week!

Day 1 of Camp Create was all about Monochromatic Magic!  This one was among one of my most challenging cards to create as I love to use a ton of colors and pattern paper!  For this card, I'm featuring MFT Circle Burst Stencil and MFT Happy Birthday Die-Namics.


Day 2 of MFT Camp Create was Awesome Ombre and oh man was I loving this day!  I absolutely LOVE ombre and what better way to showcase it then one of my favorite techniques; distress ink blending!  For this card I'm featuring MFT Make a Wish Stamp Set and MFT Confetti Background Stamp.  


Day 3 of Camp Create was another technique that I love; Remarkable Resist.  And of course, I again used Distress Ink Blending to create my background piece.  This card I'm using MFT Dainty Scallop Die and MFT Magical Dragon Stamp Set.


Day 4 of Camp Create was one of the most challenging days for me but I tried and conquered.  Day 4 was called Divine Dry Embossing.  It's a techniques that I haven't used in quite some time but am realizing that I need to revisit it, as I'm loving how this card turned out.  For this card, I've used the MFT Blueprints Tag Builder #3 and MFT Kind Thanks Stamp Set. 


Last but not least Day 5 was Stunning Shadow Stamping.  This was a new technique for me but I really enjoyed it and see myself using it again very soon.  This card was a One Hit Wonder, in that I only used 1 stamp set to create the whole card and that stamp set was MFT Make a Wish.  Can you tell I'm really loving this stamp set?!?!


I'm so glad that I got all of the cards completed.  It really challenged me and it was super fun!  I honestly cannot wait till next years Camp Create!  I'm going to aim toward participating in at least 2 sessions.

I'll be back soon with videos for all 5 of these cards for you guys!

Sunday, August 14, 2016

Where have I been?

Hey Everyone!

Its been quite some time since I've blogged or even posted a video on my YouTube Channel.  To explain where I've been, I decided to make a short video.  

Now that things have calmed down a little, my hope is to start posting for you guys a little more regularly again.  I've certainly missed creating and I'm hoping that my recent peak in my creating mojo sticks around for quite some time!

For those of you who still visit my blog and YouTube channel,  I truly appreciate it!


Wednesday, April 13, 2016

Inspired by Series Card #1 (OHWC)

Hey Everyone!!  I'm back, this time much sooner than last so we are making progress!  I've been finding things lately that have really been inspiring me to create a card or project.  It could be anything from a project someone else has created, a sunrise, pattern used in packaging, an outfit my daughters wearing, or an ad in a magazine or tv.  Inspiration is literally all around us.

So the first card that I created in this new Series that I will be doing was inspired by a card that the very talented and one of my crafting idols created;  Kristina Werner!  You can find the card that inspired me by clicking HERE.  Her coloring skills are Insane and she is just ridiculously talented.

Onto the card that I created that was inspired by her Spotlight Coloring Card.  I LOVE the Lawn Fawn mini stamp sets and sometimes I feel like I'm able to create with them better because there is only 1-2 larger images to work with, so I'm not distracted by everything else in the stamp set.  For this card, I'm using Lawn Fawn's Color my World Stamp Set.  This card is also a one layer card AND practically a "One Hit Wonder Card", with the exception of the little hearts that came from another lawn fawn mini stamp set.


And A little POP of color for the inside of the card too!


Enjoy watching how I created this card from start to finish!


Supplies:


Saturday, March 19, 2016

Love you Tons Geometric Heart Card


Hello Everyone!  I hope that you all are doing great.  Again, I apologize for it being such a long about of time since I last posted.  I'm hoping to do a short life update video for you all explaining a little bit about whats been going on.

I honestly had all of these ideas floating through my head as to all these cards I was going to create in preparation for valentine's day.....I made 1!  Just too little time in the day to get everything done.  I sometimes wish us crafters had an extra hour in the day that was strictly for crafting.  We can all dream can't we?! 


Onto the 1 card that I created for Valentine's Day, which is now just being referred to as a "love card", as it is WAY past V-day.  I have had this geometric heart design in my head for quite some time now.   I remembered it from a challenge that I participated in when I was part of the Paper Smooches Sparks Challenge Team, you can find the original post here.  And so, I was off to create something to put my mind at ease. 

Sunday, January 17, 2016

You're a Gem - BRI Guest Designer

Hello Everyone!!!  

Its been a super long time since I've had a chance to create anything and post but I'm back, hopefully in full swing.  I hope everyone has had a great start to the New Year and I'll soon fill you all in on what has been keeping me from crafting recently (in a video possibly).  


Today, I'm being featured as a Guest Designer over on the BRI Blog (BRI is short for Butterfly Reflections, Ink).   I've worked with Vanessa, the owner of BRI, for quite some time and to say I adore her would be an understatement.  She is absolutely AWESOME and her shop is the perfect place to pick up anything crafty you may need.  And the shipping....beats them all!!!  So if you haven't had a chance to check out her store, you can do so by clicking HERE.   


Since I've been away from the crafting 'game' for so long, I decided to go with something simple.  Just getting back into crafting, simple is a good place to start.  And then the juices start flowing and more ideas keep coming to you.  Hopefully, thats what happens in my case :) 

I started out with a piece of Tim Holtz Distress Watercolor Paper and used my Lawn Fawn Stitched Rectangles Dies (Small and Large) to cut out my watercolor paper and emboss a smaller rectangle in the center. 


Next, I moved onto my stamping and watercoloring.  I did some masking while I stamped the sentiment from the Avery Elle "Many Thanks" stamp set.  Using the My Favorite Things Hybrid Black Licorice ink,  I inked up "You're a" and then used some Versamark Ink to stamp the diamond and heat embossed it with some Ranger Fine Detailed White Embossing Powder.  All of the stamping was done by the newest tool in my crafting area..... THE MISTI!  And you'll be happy to know that you can now Pre-Order your very own Mini Misti Tool in the BRI Store.  Just click HERE and it will take you right to the pre-order. 

Once the embossing powder had cooled a little, I moved onto coloring in my diamond image.  I wanted it to have a watercolor look, so I reached for my ZIG Clean Color Real Brush Markers in #26 Light Pink.  I simply applied a little bit of the marker in the areas where I wanted it to appear darker and used my Water Brush to spread out the color and fill in all of the areas. 


To add a little interested to the card base today, I decided to do some watermark stamping using my Versamark Ink and the My Favorite Things Typewriter Background Stamp.  I could have used a teal colored ink to do the stamping but I didn't have anything that matched quite right, so I went with the trusty Versamark. 

Lastly, I added some foam adhesive to the back of my watercolor card stock to give it little dimension on the card base.  And we can't have a card without a little sparkle...clearly! So I pulled out some of my BRI It's in the bag Sequins in the colors, Diamonds are a Girl's Best Friend (in all sizes),  Not to Burst Your Bubble,  and Aqua-holics Anonymous and attached them with some Ranger Multi Medium Matte Adhesive.  Last little touch was using my Wink of Stella Brush Tip Marker in Clear over top of the diamond and the sentiment. 

That completes my card for today.  Hope you guys enjoyed the clean and simple look of the card.  And I look forward to creating more projects very soon, hopefully with some videos to accompany them! 

Wednesday, July 15, 2015

BRI Guest Designer - MFT Flamingo Sunshine Card

Hello Everyone!  It has been several months since I have posted anything here or on my Youtube channel.  I have been working on special projects for the BRI Store, as well as helping some family with party invitations and I just recently had my daughters 3rd birthday party.  Her party was Dalmatian themed and since I couldn't find anything that I really liked (Decor wise) I took it upon myself to spend 2-3 weeks DIYing it all.  I have recorded several video's in the process so I will be sure to have those posted soon showing you how I created a long of the party's decor.

Back on track....today I'm a guest designer over at the BRI Blog.  You can see my project that I created there and watch the video of how I created the card!  Here is a sneak peek of it below.  I hope to be back here soon, and more regularly in the upcoming weeks!


site design by designer blogs